Saturday, September 27, 2014

A Halloween Treat Box


Supplies used:
  • Scarecrow Digital Stamp Image
  • Treat Box from SilhouetteAmerica Online Store
  • Bic Markers for coloring
  • gems from my stash
  • spider web embossing folder used to embossed the mat on tombstone front
  • Trick or Treat sentiment from SilhouetteAmerica Online Store
  • Score tape for adhesive tape
Thank you for stopping by to visit with us; and check out my blog at Granny Ma's Creative Blog

Challenges I would like to enter:

Monday, September 22, 2014

Creative Cutting Challenge - Fall Theme

I used The Creative Pointe cutting file: Pumpkin Patch and created a accordion style mini-album card, cutting the shape of the background barn for front and back covers.  And inside as square pages.  Here is photos of the accordion style mini-album/card...

  Pumpkin Patch cutting file
Front Cover
Using the Pumpkin Patch cutting file I used the back shadow as the cover base for both front and back cover cut out of poster board for stability.  I had a Thanksgiving napkin I purchased at Wal-mart that I had separated (2-ply) and ironed the top piece onto freezer paper, creating my own design paper.  Placed on a cutting mat, and using my Silhouette Cameo and the just the pumpkins  with the bard, I cut out very, very carefully (even though it's on freezer paper, the napkin tended to be   distressed on edges).  I adhered the napkin piece to the first layer that I had covered the poster board with.  Than, in my files I had a red-barn scrapbook page that I printed out using my Silhouette Studio DE software and cut out the title, Pumpkin Patch and layered on covered poster board again.

Inside pages

Using two cut files from misskatecuttables I printed and cut out as a sticker, placed them on poster board that was cut out using the shape of the png photo.  Both page 1 and the last page (4) the pumpkins from the Pumpkin Patch cutting file was cut out on poster board and than one I used some chalk from Daler Rowney Soft Pastels and colored in; the fourth page I used a marker set from one of my marker sets (don't remember which set it came from).  Once I have a little time, I will add a photo of my great-granddaughter, dress as BatGirl on one of the pages.

Here is the back cover....


Back cover

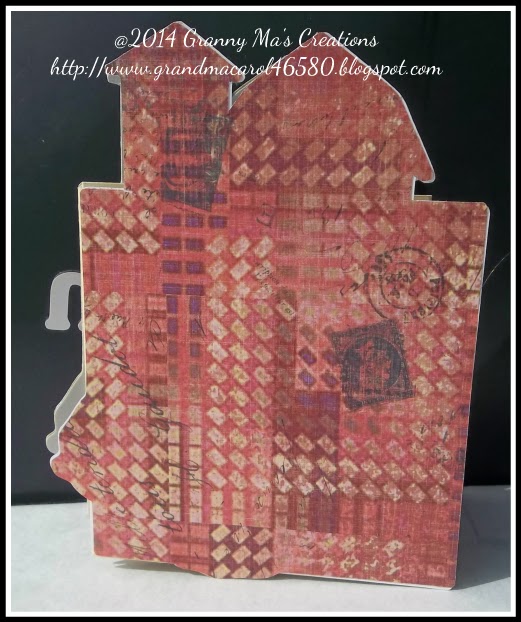
I covered the back poster board cover with paper I purchased from Hobby Lobby and this completes this project.  Now onto another part of my DT projects for Creative Cutting Challenges.. 

I have been playing around with digital scrapbooking lately along with Easy Pocket Scrapbooking .

Easy Pocket Page Scrapbook (digital)
Back to School Apple Title from misskatecuttables (I believe)

I used Adobe Photoshop Elements 12 for creating both scrapbook layouts; and have a file from MyMemories Suite and from Pixel Scrapper Digital Scrapbooking that are clear plastic pockets for easy pocket scrapbooking, in place of the actual pockets.  I placed the photos, elements and journal cards in my layout just like a actual plastic pocket layout, only digital.  Love it. 

I do have a School House Mini-album that I am creating, using the School House Cut File and will share that later.  Thank you for coming by to visit with me, and please head on over to Creative Cutting Challenges  for more inspiration.

Sunday, September 21, 2014

Sarah


Supplies used:
  • Software used:  Adobe Photoshop Elements 12
  • Silhouette Studio Design Edition
  • Bic Markers and Copic marker for skin coloring
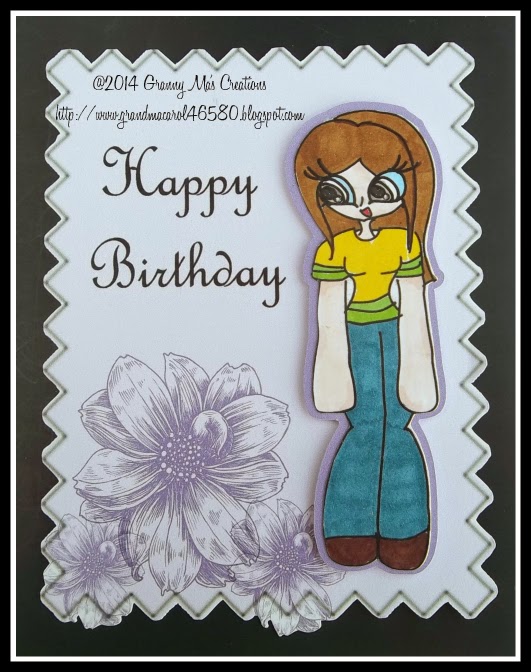
Using Adobe Photoshop Elements brushes, I created the background on the mat using Vintage Rose brush.  Once finished, I open/merged into  Silhouette Studio DE to print and cut image.  Colored the image with Bic Markers and for the skin color, used Copic marker.  Placed on the mat with foam tape and ready for a card base when I am ready to send a birthday card.

Thank you for stopping by to visit with me; and check out A Girl Who Plays for the DT's work, and look thru what is offered in the digi store.  Happy crafting to all.

I would like to enter into these challenges:

Flap Fold Card Challenge - Scrapbook Blessings Club

Video to share of how to create the Flap Fold Card


And here is the video I shared on the original blog:


 I was able to locate my photos of  project on my account at photobucket.com as the external hard drive crashed back in late June, early July....


https://blogger.googleusercontent.com/img/b/R29vZ2xl/AVvXsEh4FhxKsaBxbIL6ndIjHXWzfbL4eaQXWbGxPgOas2PIhjLrjePWz-OdfodvWPgpolMXNDMbX-ouz6l9Ep5ZgTQFfrV9aLELcXqvqEivM3hWHWx0V56El_t4e4gE635BEhblXWHCrQ/s1600/100_3819.jpeg 

Now onto the details:

Supplies used:
  • For the card base, I used Stampin! Up card stock.
  • Card #1 I used design paper from my stash of Walmart paper
  • Card #2 I used card and the flower element from the June Card Kit from Scrapbook Blessings Club Facebook group
  • Bumble Bee and pop-up flower embellishment from Reflections purchased at Hobby Lobby
  • The card stock on front and inside of Card #2 from June Card Kit
  • Polka dot embossing folder used on first card
  • Floral embossing folder on 2nd card.
  • Adhesive and foam tape
 Thank you for stopping by, and as always, have a super crafting day.

Saturday, September 20, 2014

Sam - only as Samantha Snowman


Here is another card topper using  SS-105 Sam Snowman acrylic stamp set.  I drew in eyelashes, hoping to give it the appearance of a Samantha.  Colored the scarf and cap a olive green, with a darker shade of green to create a striped  scarf.  I placed the stamped image onto Snowman design paper that I found in my stash of paper.  Than the sentiment was printed out and than punched with a scalloped circle and placed on a strip of paper that I made as a banner.  Placed on side using foam tap.  I matted with shades of blue card stock and than the design paper.  

Thank you for coming by for a visit, and happy crafting to you all

Monday, September 15, 2014

Mid-September Inspiration - Christmas Scene using Kraft

It is time for another inspirational card for Christmas All Year 'Round and I chose the stamps set from D.R.S. Designs for a card layout.


Sometimes I decide to use something that is sitting in my craft storage bin; and this time I dug out my, I don't know what you call it, but it makes the card base look corrugated like a cardboard box.  I had a left-over piece of red card stock in my stash I used to layer over the base.  Placed the cut out snow globe with the stamped images inside the globe to give it the appearance of a snowy-city.  Water colored the base of snow globe with distressed ink - Tea Dye which I love.  Placed a red ribbon over the base with silver brads on each end.  Also placed silver brads (Stampin! Up) on the 2 corners of red mat.  I stamped Merry Christmas from Teeny Tiny Words set by Stampin! Up and punched out with the word punch.  Added silver liquid pearls to represent snow flakes in the globe.

Thank you for stopping by to visit with me and hope I inspired you with my creation.  Happy crafting to all.
 
These are the challenges I would like to enter:

Saturday, September 13, 2014

SS-111 May Your Christmas Be a Sweet One

Hey, Carolyn here to share with another stamp from Sunsational Stamps.  It is in the store, just click on the link to go directly there.


acrylic stamp set

Supplies used in project:
  • Paper and card stock from personal stash
  • Stand up card base from SilhouetteAmerica Online Store
  • Tag from cutting file by The Creative Point The Pumpkin Patch
  • Merry Christmas from the Teeny Tiny Word stamp set by Stampin! Up
  • small gem in snowflakes
  • purple gems used in tree ornaments
  • black gel pen used for faux stitching around circle and tag
  • Silver glitter pen from Wink by Stella
  • Stampin! Up water based markers used in coloring the gingerbread figure
Thank you for stopping by to visit with me this weekend, and happy crafting.

Thursday, September 11, 2014

Halloween Mini-album

I finally finished the Halloween Mini-album last evening, and here is the results....


Halloween Mini-album
by Creative Kuts

The mini-album kit was supplied by Cheryl of Creative Kuts to those that would like to create this cute mini-album.  We started with the black base, than the pages we cut out and decorated.  From there we received the front and back cover cut file, cut out and decorated, along with the book binder.  The final cut file was the hat, pumpkin and cat.  

Since no eyes or mouth pieces was supplied, I thought, hmmm - I will use the movable eyes; and than using a dime I traced around the edge to get the mouth; and brackets for sides; and a squiggly line from the nose down toward the mouth.  And that completes the mini-album.  

Thank you for stopping by to visit with me today, and happy crafting


I would like to enter these challenges:

Monday, September 08, 2014

First Challenge at Creative Cutting Challenges - Anything Goes

Hey there, we're back for another year of challenges at Creative Cutting Challenges and our first challenge is Anything Goes.  I elected to create a scrapbook page of my beautiful granddaughter, and used the title, "Be-You-tiful' by The Creative Pointe

Cutting file

Supplies used:
  • 12x12 card stock for base of scrap page
  • Photo I opened up in photo editing software, using a cluster frame from PixelScrapper Digital Scrapbooking
  • Flowers from a flower swap found on Facebook page
  • Design paper from personal stash
  • I created the banner tag, and punched the bottom border with a Martha Stewart hand punch.
  • using my white gel pen, I 'stitched' the edges of mat
  • beads on top border from personal stash.
  • Silhouette Cameo used for cutting file and framed image of granddaughter.
Tried to keep the layout simple for granddaughter's scrapbook.  The photo was taken of her, by her mother, while in Korea during the winter weather.

Thank you for stopping to visit with me, and take a moment and go visit Creative Cutting Challenges for introduction to new DT members, and more inspirational creations.  And join us in the 'Anything Goes' Challenge (using your cutting machines)

Sunday, September 07, 2014

Brrrr it's Cold Out


Hi, Carolyn as a new member of the design team.for A Girl Who Crafts


Here is my card for Anything Goes Challenge:

Cold Out
A Girl Who Draws Digis 

Supplies used:
  • Snowflake embossing folder
  • PrismaColor markers for coloring
  • Scalloped punch used for sentiment
  • white gel pen for faux stitching
  • cardstock and design paper from personal stash
Please stop by A Girl Who Crafts and play along with us in the challenges; and thank you for stopping to visit with me.  Happy crafting to all.

I am entering these challenges:

A Wiper Card Challenge

The video tutorial for a Wiper Card:


and a tutorial at Splitcoaststampers 
that gives you written instructions as well as a video.

My Wiper Card showcasing my favorite:  Butterflies
retired stamp from Stampin! Up 
I purchased the stamp set off e-bay few years ago.


Supplies used:
  • Sentiment and butterfly from the Butterfly of Happiness stamp set (retired)
  • Butterfly on wiper from a single stamp that purchased from craft store.
  • Sentiment stamped with Stazon Blank Ink
  • Both butterflies stamped with Distressed Ink - Tea Dye
  • Gems in both butterflies and corners from personal stash
  • Cardstock (main) from Stampin! Up
  • Mat embossed with a butterfly embossing folder, using Big Shot
Thank you for stopping by to visit with me; and come on over to Scrapbook Blessings Club for Challenge #28 and join us in this fun group and challenges.

 I am entering these challenges:

Saturday, September 06, 2014

Sam Snowman

Hi, I am introducing a new acrylic stamp line by Sunsational Stamps and using SS-105 Sam Snowman for a Christmas card...


Supplies used:
  • Christmas Card (base) #4668 by Rivka Wilkins
  • Tag that sentiment is stamped on from The Creative Pointe cutting file: Pumpkin Patch
  • PrismaColor markers used for coloring
  • Stickles used to highlight strip in had
  • Gem stones used for center of snowflakes
  • Cream colored cardstock used for inside lining.
Thank you for stopping by to visit with me; and take a moment and visit Sunsational Stamps blog for more inspirition from the Design Team.

Friday, September 05, 2014

Challenge #99 Dogs or Cats

Good morning to you all on a Friday; I am sharing my DT project for Pattie's Creations Designs Challenges and here it is....


Supplies used:
  • Cardstock and design paper from personal stash
  • Nap Time digi image from Pattie's Creations Digital Images
  • ric-rac, sentiment 'dream big' and two flower pots from PixelScrapper Digital Scrapbooking from one of the kits she has
  • ribbon created using a kitchen fork (but I will use my Bow-Easy template from now on - so much easier for me!!)
  • Silhouette Cameo for printing the images and Brother's Scan 'n Cut machine to cut the images out.
  • Buttons and gem pieces used for embellishing the card
Thank you for stopping by to visit with me, and take a moment and head over to Pattie's Creations Design Challenge for more inspirational projects; and join us in the challenge(s).


Challenges entered:

Monday, September 01, 2014

Keep It Krafty

This month is Keep It Krafty, using kraft cardstock along with white and cream, incorporating some grey or black..  Here is my version of the Christmas card, also using a stamp set from Scrapping with Lisa Designs


Supplies used:
  • Kraft Card Stock for base of card and one mat 
  • Red card stock for another mat
  • Three white button glue ons
  • Print 'n Cut the 'let it snow' sentiment and applied to corner
  • Embossed the base card with snowflakes, applied a white ink pad to the snowflakes 
  • Two silver embellishments added to the sentiment tag.
Stop by Christmas Cards All Year 'Round  and check out the design teams projects, and join us in the challenge.  Thank you for visiting with me today, and happy crafting.

Challenges entered: