Saturday, September 14, 2013

Celebrations and Thankfulness - Fall Blog Hop


Fall is such a beautiful time of the year, it’s when the leaves start changing colors and everything around us is beautiful. It is also the season of Thanksgiving, which reminds us to take a moment to reflect on all the things we are most thankful for.

So in celebration of Fall, we are hosting a Celebrations & Thankfulness Blog Hop. As you hop along with the Kraftie Kre8ations Design Team and members, we hope you will be inspired to create your own thankfulness project.

***

Welcome to our Thankfulness and Celebrations Blog Hop which started on September 12, 2013 at Kraftie Kre8ations  and my presentation is today, Saturday, September 14, 2013.  

***


This is a Fall card that can be used to express your thankfulness to family or friend at Thanksgiving, or to celebrate the Fall season.  

This is a basket or a gate that I created a card with my Silhouette Cameo and Studio DE software.  I duplicated the basket, removed the inner pieces and attached to the side of a card stock.  Than I cut out the basket weaving  and inserted brads on the corners of the basket front.  The pumpkins was welded to the back of the card stock, and than cut out the individual pumpkins and glued to each pumpkin piece.  I added leaves to set behind the title, and one leaf inside.  Grass was added to the edge of the basket.

***

Our Challenge for the Hoppers:

Our color palette is an amazing representation of the changing colors of trees in the fall. You can create ANY project related to the Fall to include the best thankfulness day of all, Thanksgiving. It can be a layout, card, mixed media project or altered item. The sky is the limit! Once you create your project, come back here and upload your project in inLinkz link. Show off your creation. 
  
 ****
 Here are the rules for playing along!
One random winner will receive a gift from KraftieKre8ations if:

1. You become a follower of the KraftieKre8ations blog (http://kraftiekre8ations.blogspot.com/)
2. You leave a comment on each participants blog
3. You "like" or "join" the FB Group (http://facebook.com/groups/kraftiekre8ations)
4. Have FUN!

***
If you started from the http://kraftieKre8ations.blogspot.com/, then you are in the right place. If you stumbled upon our blog hop here, thank you for hopping along. Please check out the starting point.. so you don't miss any of the fabulous creations!

Order of the Hop:
 
Sept 14
La-Vie - http://cestla-viedesigns.blogspot.com/
Carolyn - http://grannymascreations.wordpress.com/ HERE
Meka - http://mmdesi9ns.blogspot.com/   NEXT
Connie - http://Desi9nsbyebony.blogspot.com/

***

Thank you for stopping by to visit with me, and check out the Hop and become a follower of the Facebook FB Group.

Friday, September 13, 2013

Weddings

Over here at Stampin with the Dragon we was asked to create a wedding card, and I was viewing videos on youtube.com recently and came across a video to create a Gate-fold easel card, and I thought how cute.


With my trusty Studio DE software, I placed the image onto the mat, traced it and than printed out on cardstock.  I hand cut around the bride and groom.  Once I finished coloring the image, I placed onto a embossed card, using my swiss dot embossing folder.  I printed Congratulations and Wedding with the print and cut option.  Papers were provided by Stampin with the Dragon.  I created a bow with my easy-bow maker, and placed just under the easel card with a button placed in the center of bow.  The closure for the card is a belly-band with a label created from paper design from my Silhouette library.

Head on over here for  Amy's Wedding Day with Heart image.  And the video for this Gate-fold easel card is here.

Now who to receive this wedding card --- my brother and his soon to be wife.  

Thank you for stopping by to visit with me and blessings to all

*****

Challenges entering:

Thursday, September 12, 2013

Halloween Overlay Card


Good morning.  Trying to catch up on my projects, and seems like I get behinder all the time. LOL  This card is using a Halloween overlay created by Marji Reineke Franklin with Creative Kuts.  

I cut out the overlay in black on layered on a orange card.  Then I cut out the overlay again in yellow, and detached the sun and the house, and then backed the piece for lighting in the house. The sentiment, Boo, I had a small die cut that I ran thru the Big Shotz machine, 2 x's, and placed the yellow on top of a the white with foam tape to give it some dimension.  Created a Halloween card to send to a granddaughter, or may-be place in the next 'care-pkg' to my grandson at Purdue.

Thank you for stopping by to visit with me today, and hugs and blessings to all.

Wednesday, September 11, 2013

Happy Birthday Blog Hop


Various shades of pink, lavender, white and other pastel colors.  Here is my photo:


This is considered a Twisted Easel Card, which I cut out a base 4.25x8.50, folded the main base in half, at 4.25 inches.  Than I folded the top of the folded base at a triangle, and placed a 4.25x4.25 square on, at an angle, hopefully the next picture will show what I talking about.


The next set is a front shot of the card...


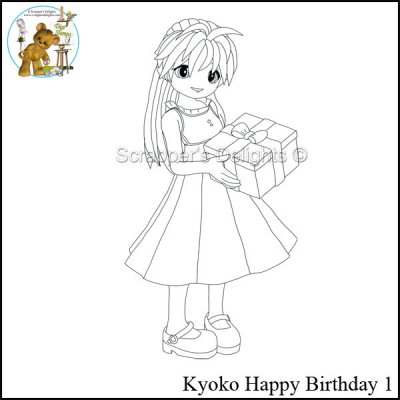
Using my Stampin! Up Ink markers, Pretty Pink and Pixie Pink, I colored the dress two shades of pink.  The hair is Creamy Caramel (discontinued in 2013-14 catalog), and new colors for the gift package  she is holding: Rich Razzleberry, Tempting Turquoise, and Calypso Coral.  The shoes two shades of brown by Stampin! Up: Close to Cocoa and Chocolate Chip.  

The gifts on the front and inside of card is print and cut using my Silhouette Studio DE, the light pink card, that is layered on the darker pink is punch with my scalloped eyelet punch

Here is the card laid out fully and hope you will be to see it.


****

Name of this image is 

available from: Scrapper's Delights Store.

***

Thank you for stopping by to visit with me today, and stop  http://scrappers-delights-challenge-blog.blogspot.co.uk for a look see at fellow teamies projects.

***

Challenges entered:


A Bootyful Night

For this challenge we're to follow a sketch ....

 
***

And here is my creation


I placed the witch in an oval, using my Sizzix Oval die cuts (and using my new magnetic board from Stampin Up) to cut the printed image first, and than cut out the next size up of the oval and than once again with the size down to create the black frame.  The side piece is printed from a image I purchased from the SilhouetteAmericaonline store and cut it so the tree shows.  Placed a black and white polka dot washi tape across the center, and than cut out bats and spiders as embellishments along with a run down fence.  Stamped 'Happy Halloween' using my Teeny-weeny sentiments from Stampin Up.

Thank you for stopping by to visit with me and head over to here for the challenge and join in the fun.  Hugs to all.....